How To Apply Images To Models In SketchUp: Tom’s SketchUp Guide 3

Hi, I’m Tom. Welcome to my third SketchUp guide. In this tutorial, I’ll be showing you step-by-step how to apply an image to a model in SketchUp. If this is your first time reading one of my guides, let me introduce myself: I am Tecna UK’s in-house Designer, Tom Reddy.
Here at Tecna UK, we are always working with SketchUp to design modular displays for our partners. With that in mind, I wanted to create a series of helpful tutorials to show you how to use the design software that we use every day.
Why Should I Lean How to Apply Images to SketchUp Models?
Once you know how to apply an image to your model, you’ll be able to visualise what your modular display will look like once the graphic artwork has been added. The finished product in all its glory.
Before You Start: What You’ll Need For This Tutorial
- SketchUp Software
- Photo editing software – In this guide, I’ll be using Adobe Photoshop. Not only is it the industry standard, but it’s also my favourite to use!
1. Finding Out Your Model Face Dimensions
First up, you need to find out the dimensions of the face onto which you would like to apply your image. Following this first step is important, because once you know your dimensions you can then resize your image to match them.
- If your artwork is too small: It will not meet all the edges of your model face when imported into SketchUp.
- If your artwork is too large: SketchUp will trim the image where it exceeds the edges of the panel, leaving you with cropped artwork.
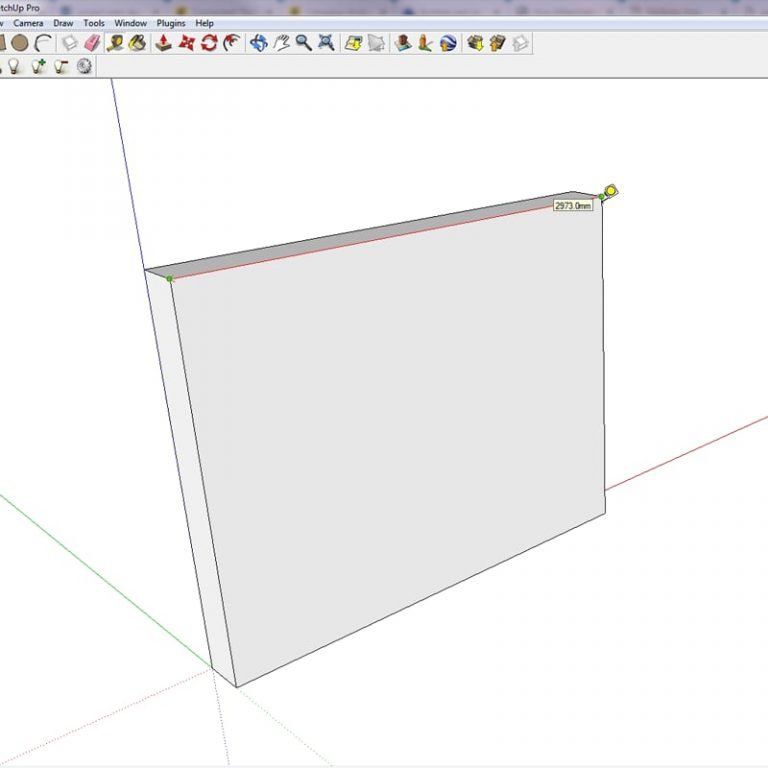
How to Measure the Dimensions of your Model Face
To measure the dimensions of a model face in SketchUp:
- Select the tape measure tool or press the T key.
- Left-click the starting point of the side you would like to measure.
- Finally, move your cursor and left-click at the ending point you would like to measure.
- Do this for all sides you would like to measure: height, width etc.
2. Create and Size Your Image to Fit Your Model
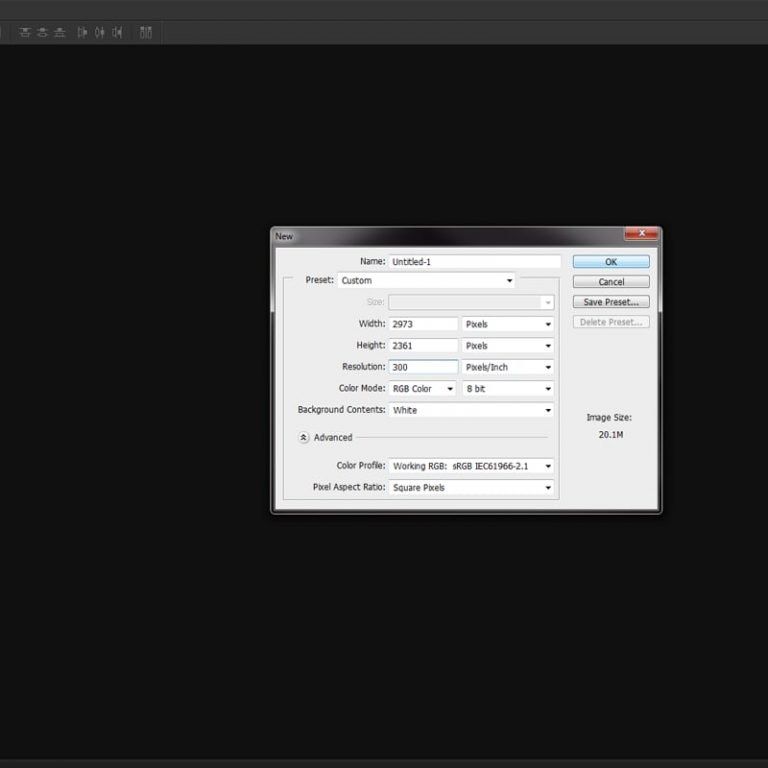
Set up your Image Document in Photoshop
- Open Photoshop.
- Select File > New
- In the New Document window that pops up:
- Set the width and height measurement of your document to Pixels.
- Enter the number of pixels to match the mm dimensions of your model face. e.g. For a face measuring 2973mm x 2360.5mm, you should set as 2973 pixels x 2360.5 pixels in Photoshop.
- Set the resolution to either 72or 300pixels/inch (300 is the industry standard for images for larger models, but 72 is fine and will save on file space)
- Set the Colour Mode to RGB.
- Then press OK.
- You will now have a white canvas that matches the dimensions of your SketchUp panel
Resize your Image to Fit the Document
- Drag and drop a saved image from your computer into your Photoshop canvas.
- Resize your imported image to fit the canvas.
To do this:
- In the secondary top toolbar, set Auto-select: to Layers and check the box.
- Click on your image to auto-select that layer.
- Press Ctrl + T to enter transform mode.
- Hold Shift and click and drag the corner of your image until it is the desired size.

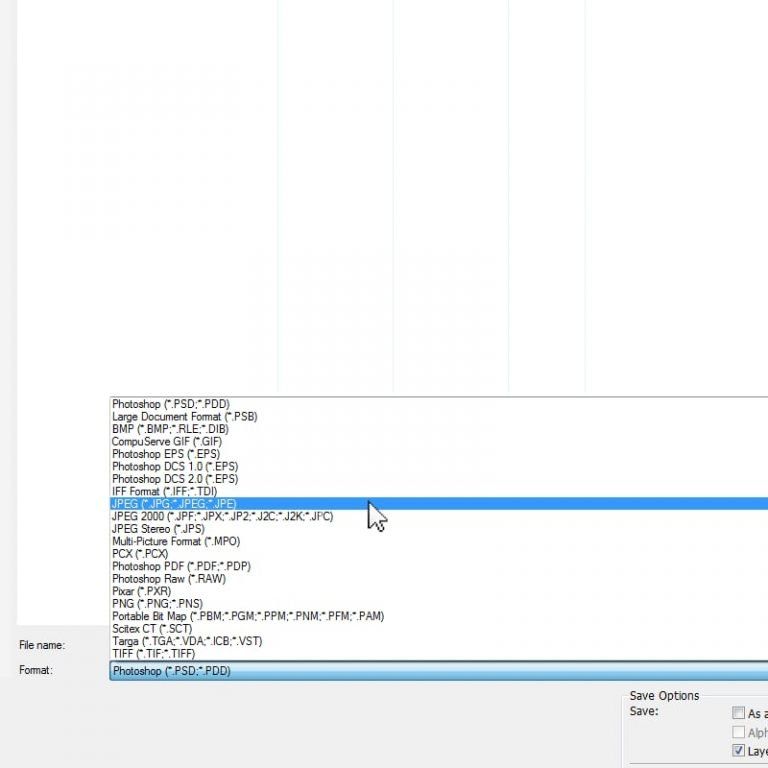
Save your Image
- Save your image as a JPEG:
- Go to File > Select Save As…
- Select the JPEG Format > Click Export All
- Save the file to your computer.
3. Import and Apply Your Graphic Artwork
Before Importing, Ungroup your Model
- Go to your SketchUp 3D Model.
- Left-click once on any panel of your back wall.
- The panel you have clicked will highlight dotted blue if ungrouped.
- If it doesn’t, proceed to right-click on the panel and select Explode from the drop-down menu.
Import your Image into SketchUp
- Click on the face where you would like to apply your image.
- It will now be highlighted.
- With the face highlighted, select File > Import.
- On the right-hand side of the window that pops up, select the option: Use as Texture.
- Locate your JPEG in Windows Explorer or Mac Finder and select Open.
Apply your Image to your Model Face
- You’ll now be back in your project but this time with a paint bucket cursor.
- A small blue dot on your paint bucket cursor will indicate that your panel has not yet snapped into alignment with your desired panel.
- Hover the paint bucket cursor over the bottom-left-hand corner of the desire panel, and the blue dot should change to a green dot and snap into place.
- Click and release on the bottom-left-hand corner of the panel.
- Move the cursor to the top-right-hand corner of the panel and click again to set the image parameters.
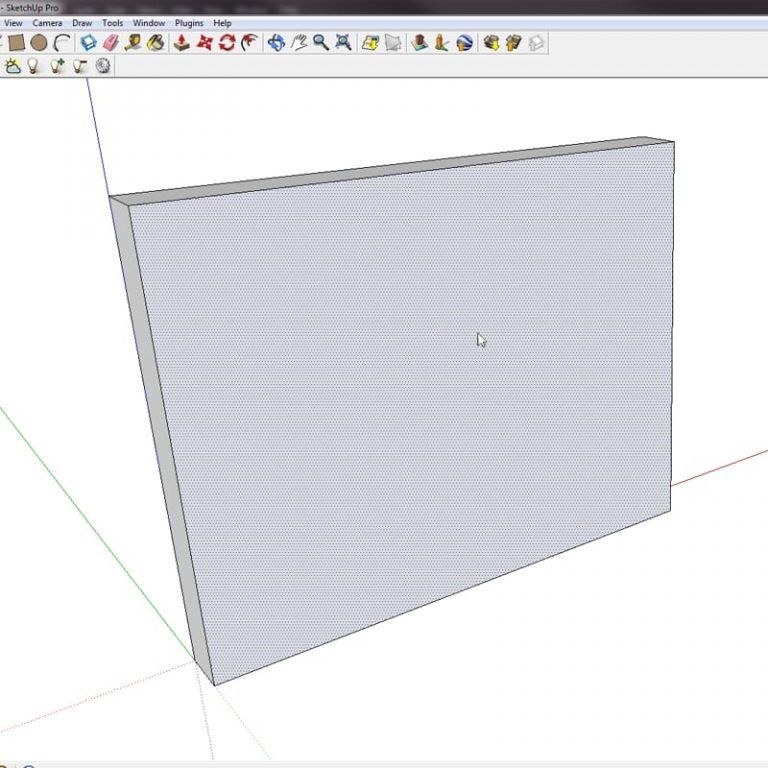
- Your artwork will now appear on your back-wall panel.

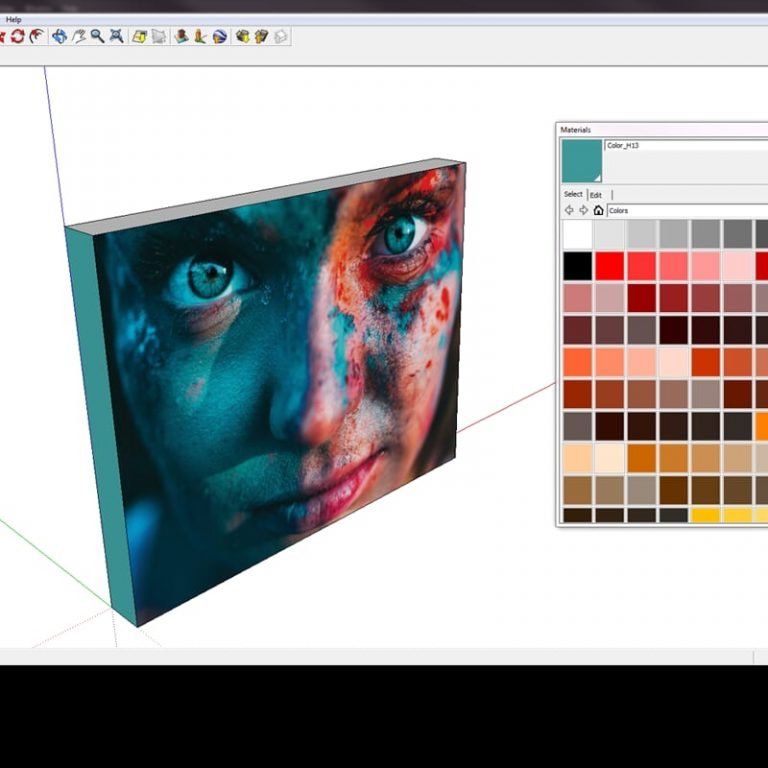
4. Add Colour to the Remaining Model Faces
- Left-click on any of the remaining blank faces.
- Press B to bring up the Materials window.
- Within the Materials window select the colour you want to apply.
- Your cursor will now transform into a paint bucket.
- Left-click on the surface where you want to apply the colour.
- To exit this mode, press the Spacebar to return to Select mode.
- Repeat this for all of the panels where you would like colour to be applied.
Finish by Grouping your Wall
- Triple-click anywhere on your back wall.
- Right-click anywhere on your back wall.
- Select group from the drop-down menu.
I always group my entities because it is good working practice.
And that’s it! I hope you’ve enjoyed my SketchUp tutorial on how you apply images to a model in SketchUp. I love getting the chance to share insights with you, and I hope they help you on your way to creating some seriously impressive modular display designs.
If you’re looking for other guides on SketchUp, why not take a look at my beginner’s guide on building a 3D model from scratch. Or find out how to duplicate objects in SketchUp


Copyright © 2023 All Rights Reserved by Tecna UK Ltd Registered Company Number: 06459394